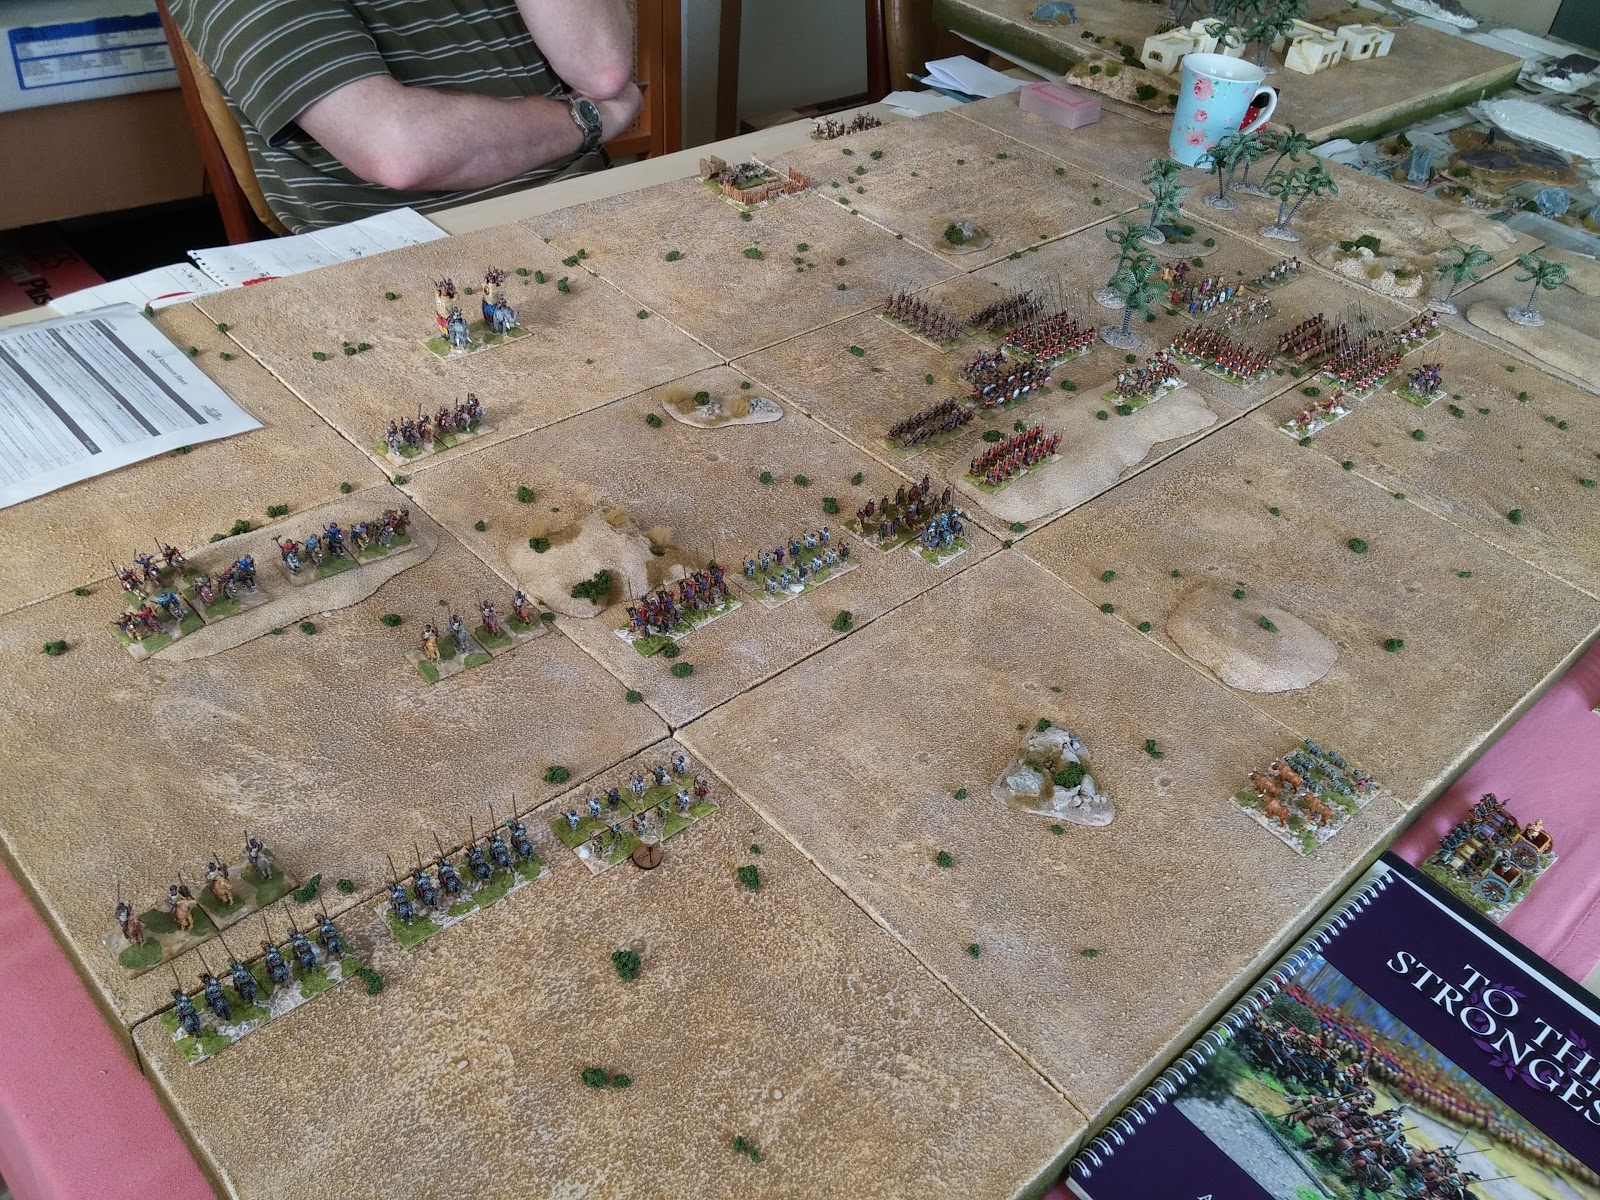
On a sunny Sunday afternoon in Manton we gave To The Strongest another play. This time we were pitting Mark's Seleucids against Steve's Carthaginians. The Seleucids had two commands, one with four pike units supported by light troops and another with a more diverse selection of units including two Cataphracts, a unit of Agema, a unit of Thracians, one of Thureophoroi, two raw Bowmen units and a unit of Scythed Chariots. The Carthaginians had three commands, their left command was made up of Spanish Scutarii, Italian Allies and a unit of Ligurians with a couple of units of light troops. Their centre was made up of African Spearmen and its right comprised veteran cavalry, some Numidian light horse, some light troops and a unit of Elephants.
This is an overview of the battlefield with the two armies deployed.
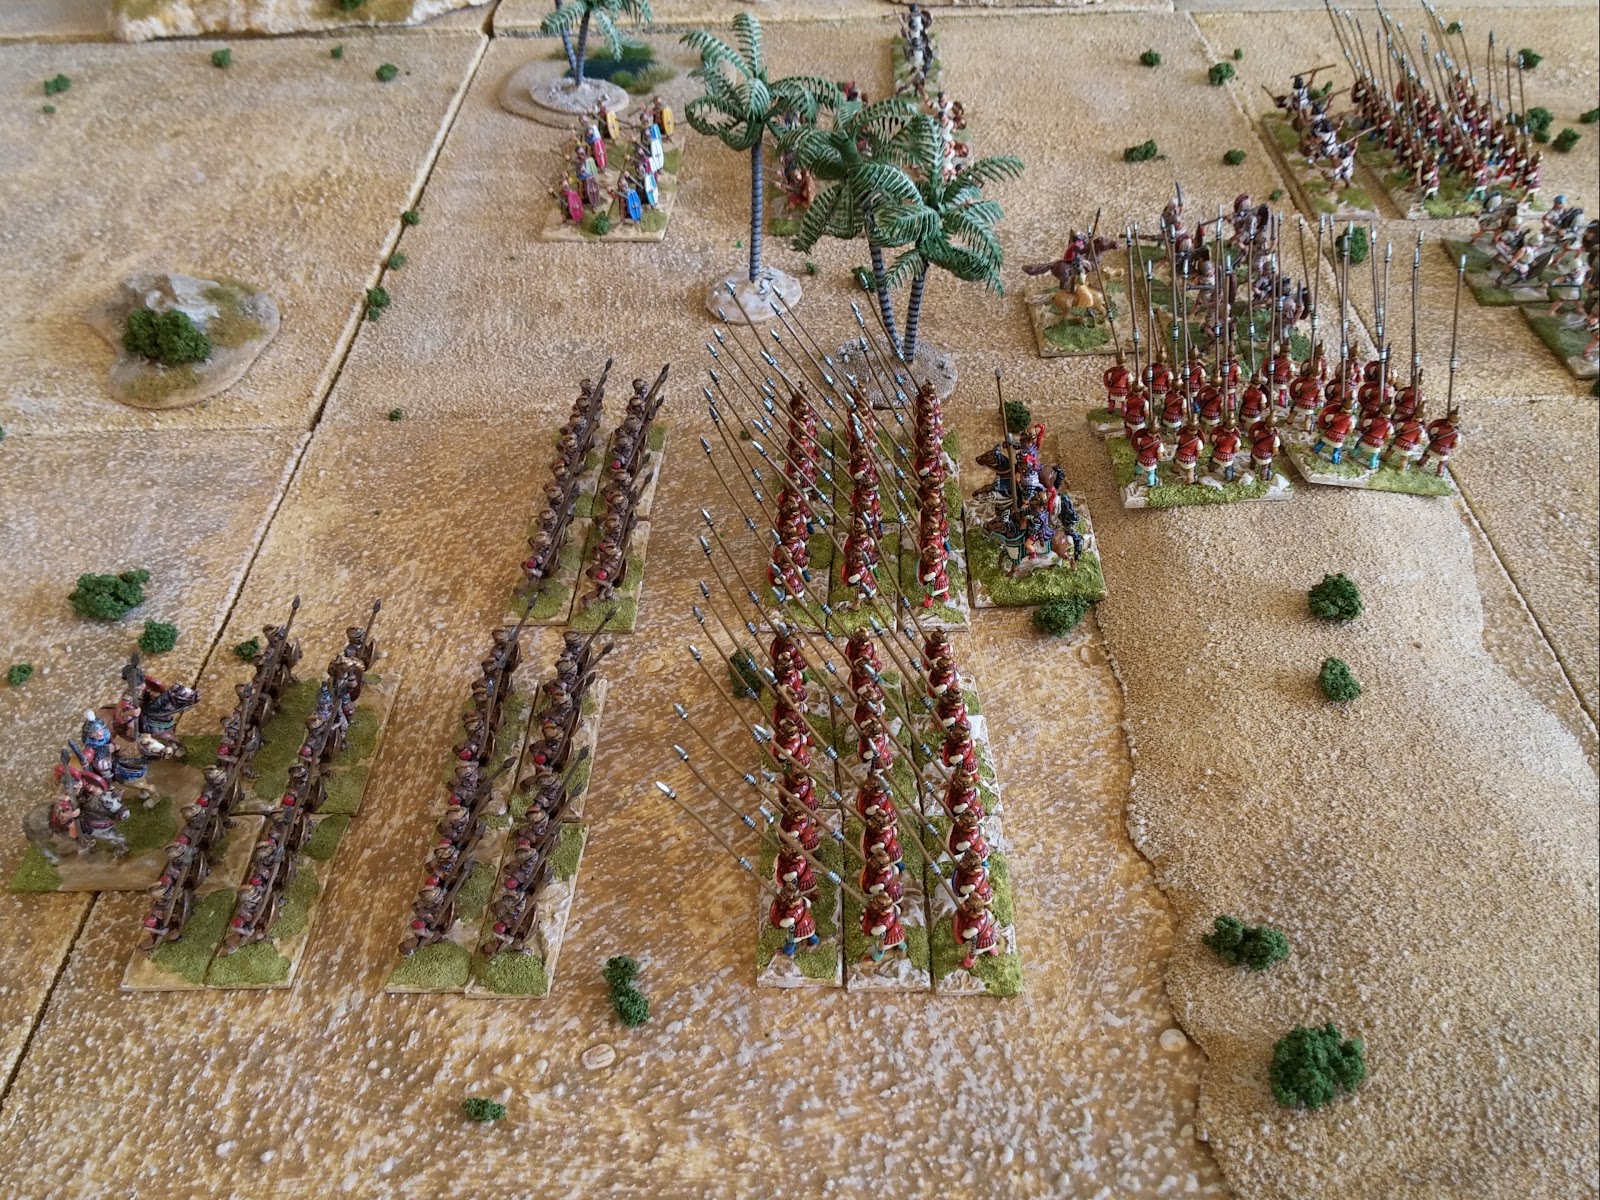
This is a close-up showing the Seleucid left wing, confusingly on the right of the photo and the Carthaginian right on the left of the photo.
A close-up taken from behind the Seleucid left flanks General. It shows the unit of Agema the General is currently attached to, the unit of Scythed Chariots, the unit of Thracians and just visible on either side the units of raw bowmen.
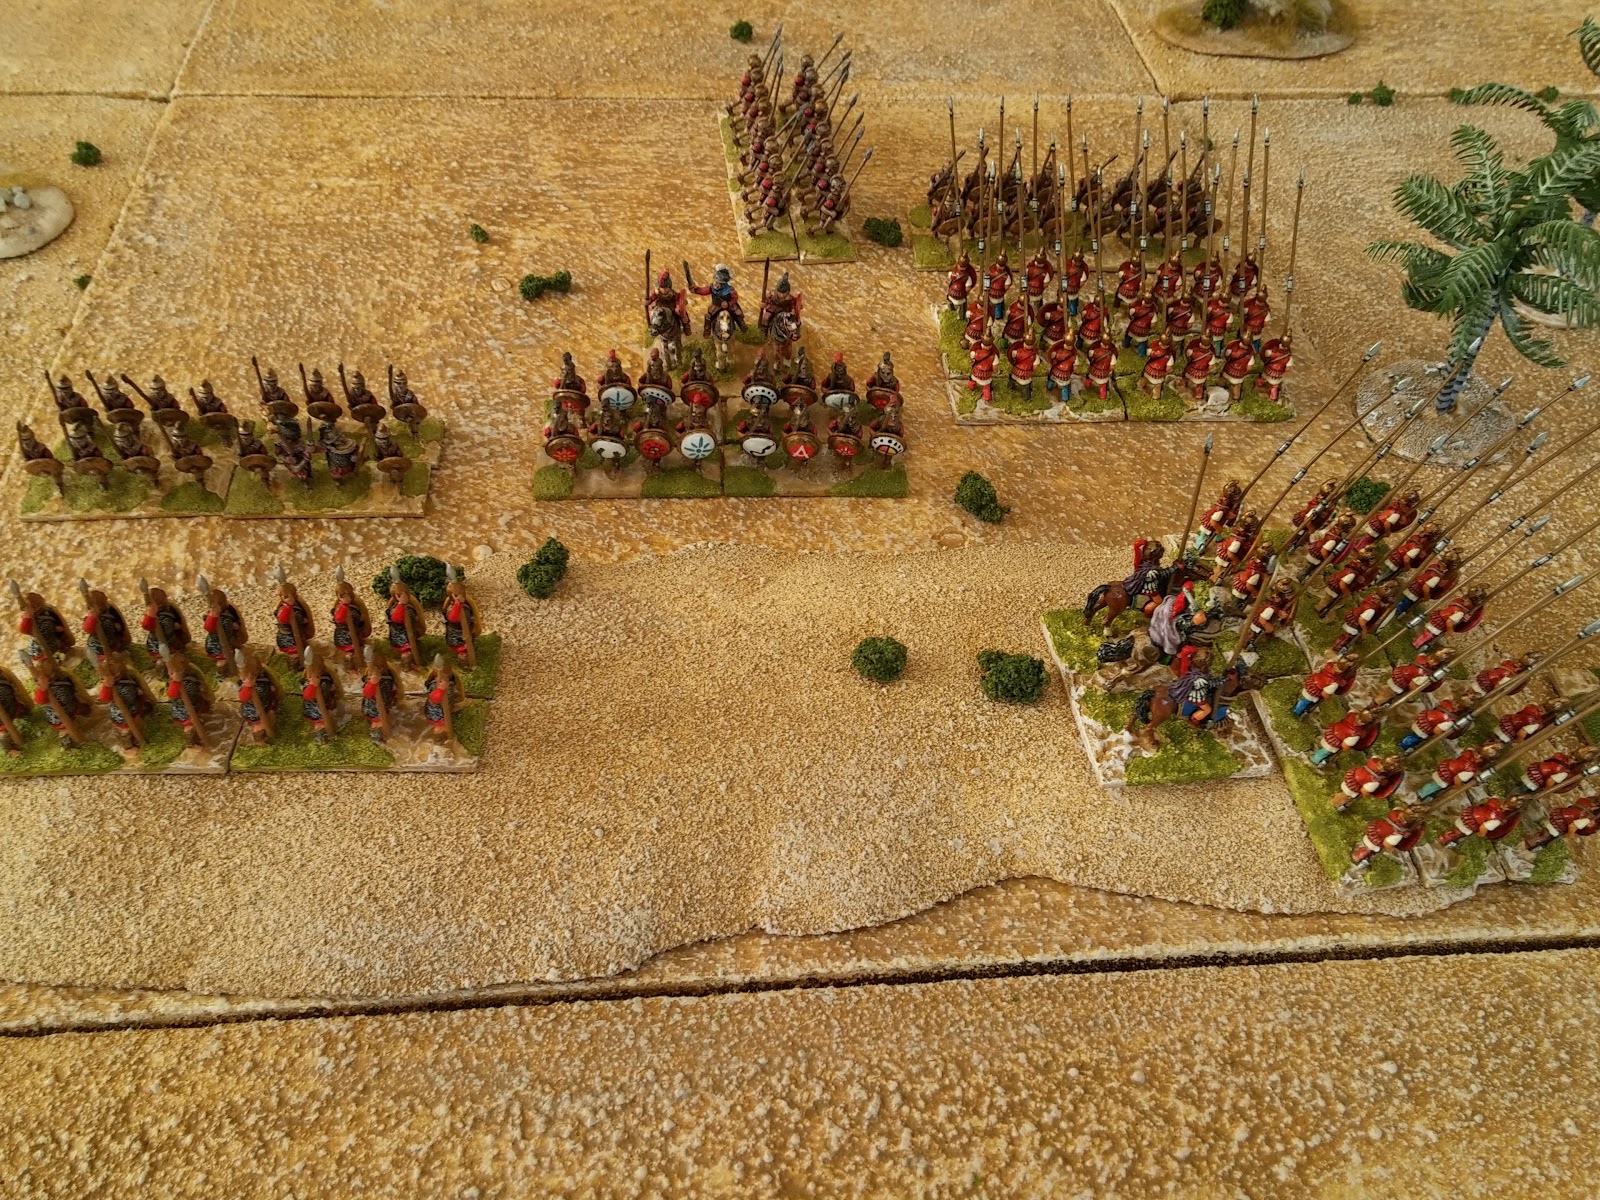
A view of the Carthaginian centre from the Seleucid side of the field. The fortified Carthaginian camp can be seen in the background.
The Carthaginian right flank with Numidian Light Horse and veteran Celtic Cavalry.
After turn one the Carthaginians were advancing in the centre and their left with little movement on thier left. The Seleucid phalanx had taken up a defensive position on the hill and on the left I was engaged in complex manoeuvres to get my scythed chariots into play. I'd also extended my line to the left to block the Carthaginian Numidian Light Cavalry.
On the Carthaginian left the Spanish Scutari had captured a small wood.
The phalanx on the hill looks on as the Carthaginian spearmen advance.
This was the beginning of my fixation with getting the scythed chariots into place.
The Seleucid Cataphracts secure their armies left flank.
Turn 2
By the end of turn two the centre had engaged and the phalanx had turned in on the Spanish that had pushed out of the wood. The Seleucid left and Carthaginian right had hardly moved. Watch the Carthaginian Elephants.....
The Numidian light cavalry ride forward.
A close up on the centre fight.
Turn 3
After turn three the Numidians had engaged the Cataphracts with their javelins. The centre engagement continues with the phalanx seriously disjointed. On the left I'd managed to get the scythed chariots on to the hill but achieved little else. The Carthaginian Elephants hadn't moved.
The scythed chariots were up on the hill but the phalanx to their right was already disrupted.
The Spanish held off the phalanx to their flank, whist the Italians faced off against a second, disrupted phalanx.
Turn 4
The fight in the centre was going badly for the Seleucids with a pike phalanx crumbling and fleeing. The Spanish survived repeated attacks by another pike block and the Seleucid left and Carthaginian right didn't move much.
Greek Hoplites are about to exploit the destruction of a Pike block but my scythed chariots were about to ride down all before them.......
The phalanx on the extreme right of the Seleucid line was crumbling after taking two hits and its compatriots on the hill couldn't manage to kill the Spanish.
The fairly inert troops on this part of the battlefield have hardly moved and the Elephants haven't moved at all.
Turn 5
In turn 5 the pikes in the centre had rallied and on the right there was a glimmer of hope for the Seleucids.
The scythed chariots had shot their bolt and managed to do nothing. The Thureophoroi moved up on to the hill to cover the chariots inevitable destruction, I had realised there was a risk to this manoeuvre but given the dire situation I thought it was worth it.
The Spanish were finally disrupted but there was a unit of Ligurians waiting to get into the action.
Turn 6
The scythed chariots were destroyed by the spearmen they'd attacked. These troops had exploited their success to attack the Thureophoroi on the hill. The phalanx was holding on, just and on my side of the battlefield, little had changed. The Elephants had still not moved.
There was a worrying hole in the Seleucid defences. With troops ready to move through.
A doubly disrupted pike block looked about to crack.
The Carthaginians began a slow move to withdraw troops to put more pressure on the centre.
Turn 7
Finally the pikes had finally had some success but the Seleucids were still in trouble in the centre.
Despite moving up the Thracians to slash at the Spears, whilst attacking down the hill the Seleucids did nothing.
But the Spanish were finally dead.
Turn 8
This photo was taken part way through turn 8. The major developments are shown below.
Also for those eagle-eyed readers Steve's shirt changes from pink in the previous turn to striped in this picture. This is because we played the game over two sessions.
The Carthaginian right's General led a unit of Cavalry up to threaten the Seleucids.
The pikes have been able to rally but the Ligurians have moved up to replace the Spanish.
Turn 9
The Carthaginian Cavalry have engaged the Thracians, the leftmost pikes have been flanked by Spearmen and the Hoplites on the hill have been flank charged by a unit of Tarentine Cavalry.
The Thureophoroi failed to hit the Spearmen they were facing but had killed the General who due to the Patrocles Stratagem survived unhurt. The Hoplites were disrupted by the Tarantines. The flanked pikes were doubly disrupted.
The pikes here were struggling to defeat their foes.
Turn 10
It looks like a great turn for the Seleucids. Not only have they destroyed the Italians on their far right, the Tarantines have destroyed the Hoplites on the hill. They've also disrupted the Carthaginian Cavalry on the left. Oh and the Elephants still haven't moved. However not all went their way, the flanked pike block had attacked, not done any damage and were then destroyed.
The Agema move out to threaten the disrupted Cavalry.
The second pike block collapses and the Spearmen attack the Tarantines.
The Italians fled leaving some light troops as the only cover for their left flank. The command is demoralised.
My best turn of the game in terms of units activated. This stack is as high as the total of my last four turns.
Turn 11
The final turn the pikes destroy the light troops to their front and march for the camp. Seleucid lights try to stem the Carthaginians in the centre. On their the left the Seleucids kill the Carthaginian General and disrupt more Cavalry. At the same time pushing on with their Cataphracts. Overhead shooting by the raw bowmen hits but is saved. You can also see my Reinforcements have arrived, in the form of a unit of Scythian Light Horse Archers, to the left of the camp towards the bottom right of the photo.
Finally the Cataphracts move. Which was one move more than the Carthaginian Elephants who never moved for the whole game. Steve and I shared the same sort of luck with our activations on this side of the field....bad!
The Carthaginians have disrupted Cavalry and Spearmen and their right flank General is dead, killed by the Thracians and their two-handed Rhomphaia.
There's little to stop the Carthaginians on the hill but the death of the General was too much and their army breaks and falls back.
The game was touch and go all along. One more unit of pikes and the big Seleucid command would have been demoralised. That would pretty much have been it for the Seleucids. All in all a really good game which could have gone either way.